Navio: Hardware setup for APM
Raspberry Pi provides a set of peripheral interfaces which can be used to connect additional hardware. Navio provides access to these interfaces on it’s ports. Even though the set of interfaces is limited, it is possible to add more by using USB adapters. This guide demonstrates how different hardware can be connected to Navio and how to properly power it up in a drone.
This document is not updated, please proceed to docs.emlid.com for latest version!
Typical hardware setup

Power
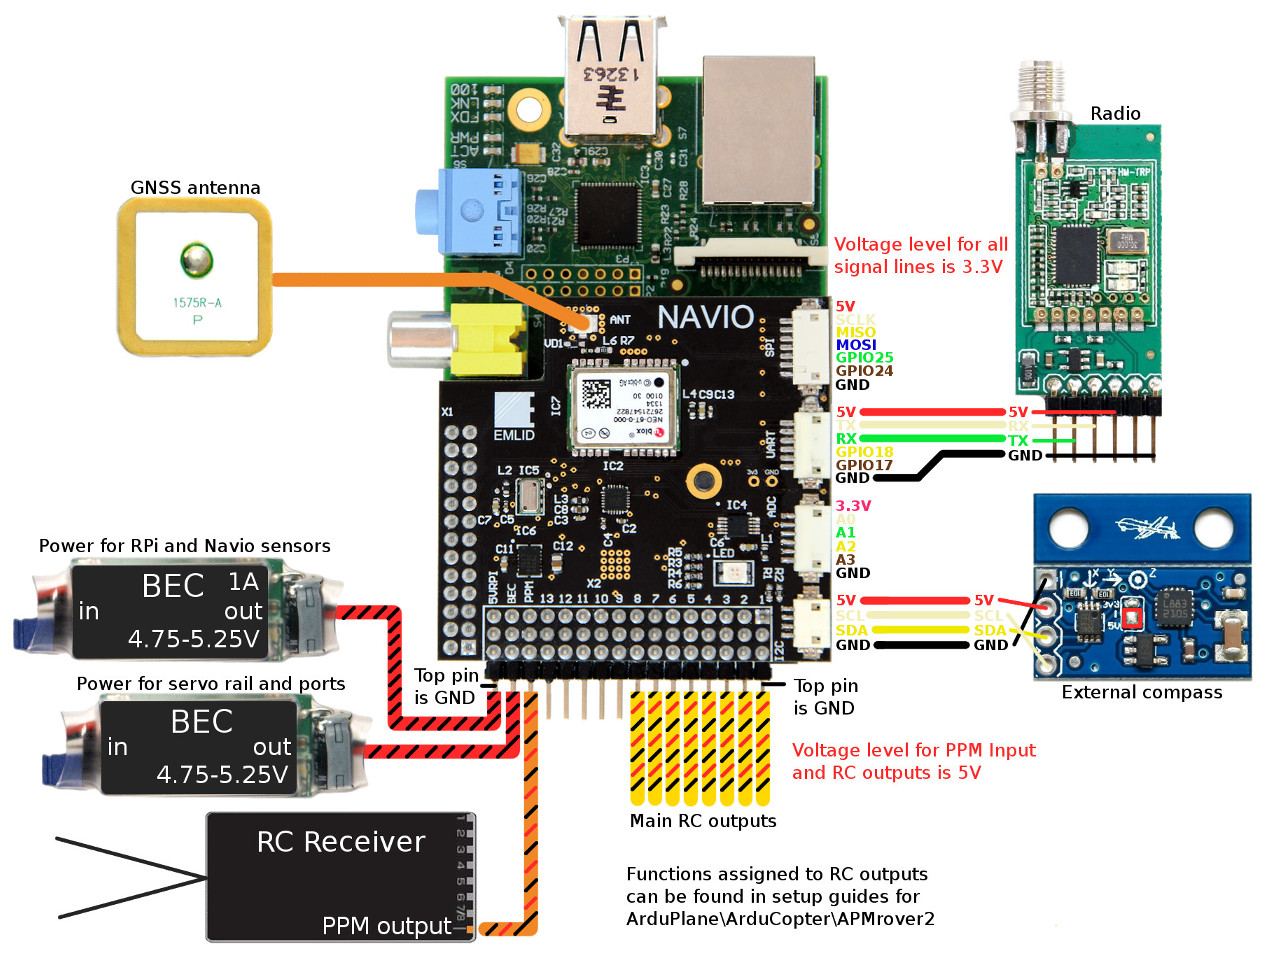
Raspberry Pi is sensitive to voltage drop-outs as they cause it to reboot, to protect it we separated power circuits for Raspberry Pi \ sensors and servo rail \ ports. Power input for Raspberry Pi and sensors is labeled ‘5VRPI’, while power input for servo rail and ports is labeled ‘BEC’ and both are located on 2.54mm header. That way by using two different power sources you can connect servos, radio modem and other power-hungry loads without disturbing Raspberry Pi.
If you are not connecting any high load you can simply power Raspberry Pi and Navio’s sensors using Pi’s microUSB socket. Do not connect power to the microUSB socket and ‘5VRPI’ input simultaneously, it will damage the boards.
Acceptable voltage level for Raspberry Pi is 4.75-5.25V, provided current should be at least 1A for Raspberry Pi + Navio.
PPM Input
RC receiver’s PPM output should be connected to ‘PPM’ pin on 2.54mm header. ‘PPM’ input accepts signal with 5V level.
RC outputs
RC outputs on 2.54mm header provide PWM values with 5V voltage level that can be used to control servos or motors. Functions that are designated to RC outputs can be found in APM Plane, Copter, Rover setup guides.
GNSS antenna
GNSS antenna for Navio’s onboard GNSS receiver should be connected to the u.fl socket labeled ‘ANT’.
Radio modem
Radio modems that work over UART interface can be connected to the Navio’s UART port. Please note that power on UART port is 5V and it is powered by the ‘BEC’ power input.
External compass
MPU9250 sensor onboard of Navio contains magnetometer, but sometimes it is better to use external compass that can be placed in an environment with lower magnetic interference. There are a lot of HMC5883L breakout boards, but for such board to be compatible it is required that the board can be powered by 5V. This one is compatible.
External GPS + compass and radio over USB

External GPS + compass
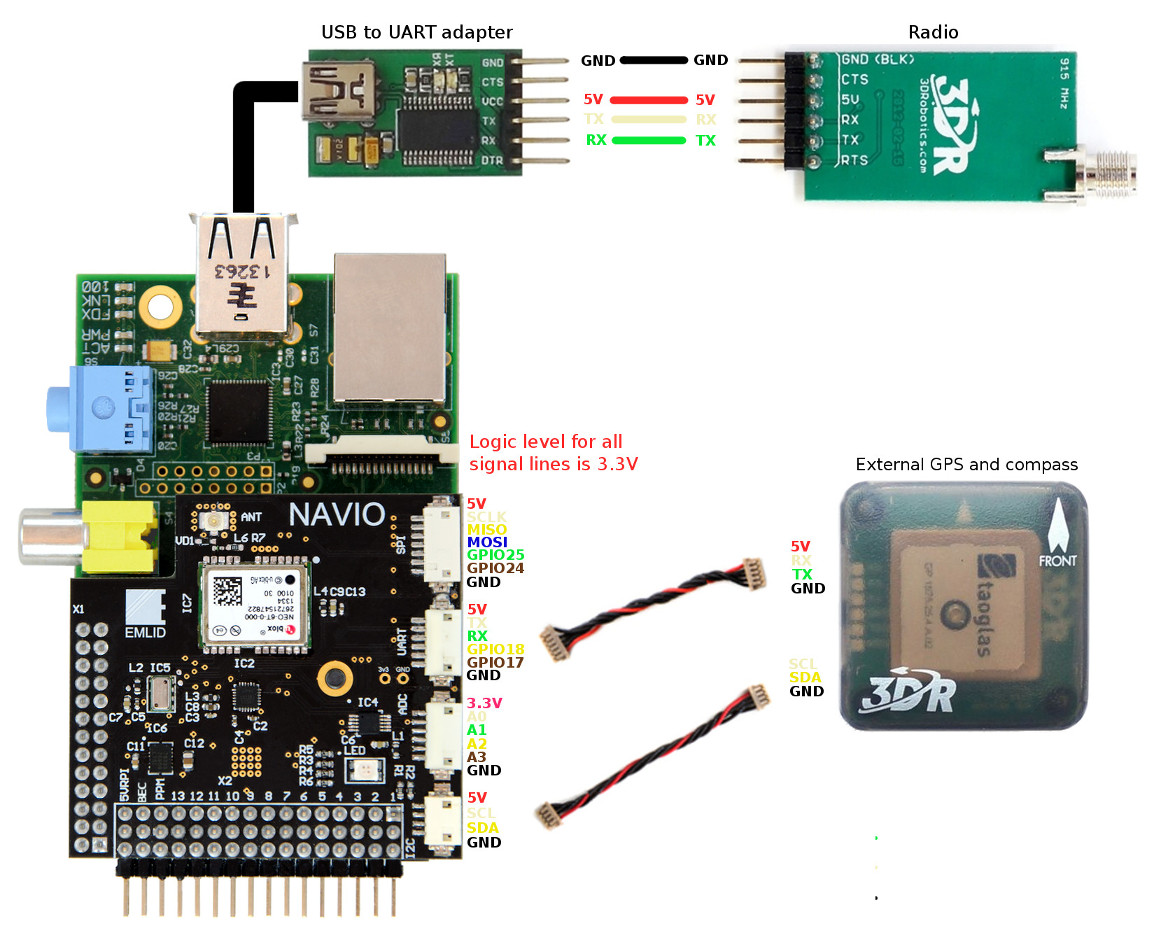
Navio contains an onboard GNSS receiver, but it is possible to connect external one if needed. As UART and I2C ports on Navio have the same pinouts as on Pixhawk it is possible to connect any Pixhawk-compatible GNSS modules with their provided wires, they usually have an external compass built-in which can be used too by connecting over I2C DF13 wire. Older modules such as ones for APM 2.5 could be used with proper wiring.
Radio over USB
As Raspberry Pi only has one UART interface in case you would like to use an external GPS there would be no UART ports left for a radio modem. In that case it is possible to add more UART ports by using USB-to-UART adapters that are usually built with Silabs CP210x or FTDI chips such as this one.
Voltage and current sense

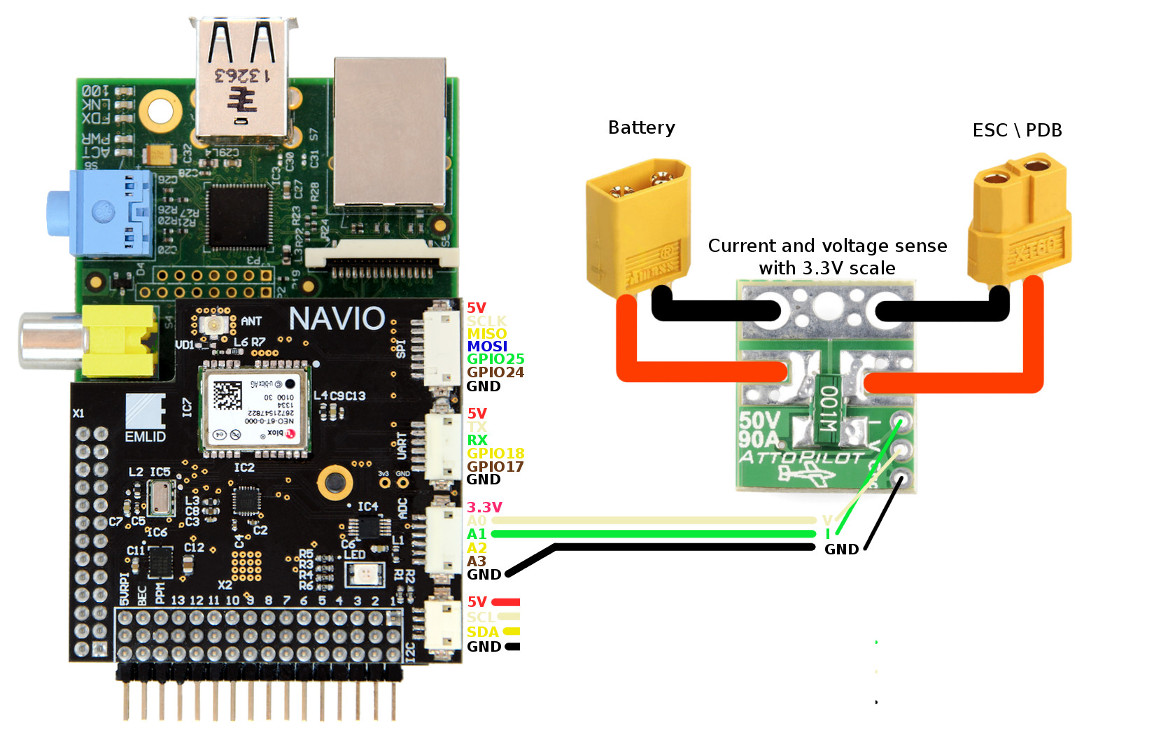
To measure battery’s voltage and current use sense boards that provide measurements scaled to 3.3V. Series of AttoPilot voltage and current sense boards rated for different currents can be used for these purposes. Connect A0 and A1 channels of ADC to the voltage and current sense correspondingly.